Attaching Magnets with Screws & Bolts
Attaching Magnets with Screws & Bolts
Attaching magnets with screws is one of the most reliable ways to mount magnets when you need a highly secure attachment, repeatable positioning, and good resistance to shock, vibration, and long-term handling. A properly clamped magnet doesn’t creep like tape, doesn’t age like many adhesives, and it’s easy to service or replace without destroying the surrounding parts.
This guide covers the practical details that make screw mounting work in the real world: hardware choices (screw materials, head styles, washers, and thread-locking options), magnet hole styles (countersunk, counterbored, thru-hole, and steel cup/housing options), and installation practices that prevent the most common failures — cracking brittle magnets, screws backing out, and corrosion from damaged plating or wet environments. The goal is simple: keep the magnet seated flat, keep clamp load stable for the life of the product, and avoid introducing gaps or stress risers that reduce holding force and increase breakage.
Disclaimer:
This information is intended as a general guide for attaching magnets with screws and bolts, but is not a substitute for professional engineering advice. If you have any questions about the best way to attach your magnets, please do not hesitate to contact us.
Screws Vs Other Attachment Methods
 |
Screws are the “mechanical insurance policy” option. They’re predictable, removable, and very secure, especially when the product might be dropped, vibrated, heated, or exposed to moisture. The problem with glues and adhesive tapes: |
Magnetic Vs Non-Magnetic Screws
Choosing a magnetic (ferromagnetic) screw versus a non-magnetic screw can meaningfully change how a magnet assembly performs.
A magnetic (steel) screw can improve magnet performance by providing a low-reluctance path for the flux to travel through, often increasing holding force. Pairing it with a steel washer/backer can boost performance further by directing the flux and reducing field leakage. A non-magnetic screw (brass, aluminum, and many stainless grades) won’t help the magnetic circuit as the flux ignores these materials.
Non-Ferromagnetic Screw
|
Ferromagnetic Screw
|
| Force results may vary | Force results may vary |
Non-Ferromagnetic Screws
The magnetic field will virtually ignore non-ferromagnetic materials. These screws are essentially “invisible” to the magnetic circuit, so they do not increase holding force. Choose these when you want the screw to be purely mechanical (mounting/retention) and not part of the magnet’s performance.
| Material | Appearance | Typical relative permeability, μr | Force results will vary |
Force results may vary |
|---|---|---|---|---|
| Stainless Steel (300 Series) | ~1.003 -1.02μ (Not Ferromagnetic) | Force results will vary | ||
| Titanium | ~1.0 μ (Not Ferromagnetic) | Force results will vary | ||
| Aluminum | ~1.0 μ (Not Ferromagnetic) | Force results will vary | ||
| Brass | ~1.0 μ (Not Ferromagnetic) | Force results will vary | ||
| Copper | ~1.0 μ (Not Ferromagnetic) | Force results will vary |
Ferromagnetic Screws
A ferromagnetic screw can give a small performance boost because it can act like a low-reluctance flux path through the center of the magnet assembly. How much it helps depends on the magnet size, thickness, and polarity orientation.
In typical real assemblies, the increase in holding force is usually 0–20%, and in many cases it’s closer to “a little” than “a lot.”
Treat it as a bonus, not the main performance lever. If you need a big step up in force, the washer/backer shown below is the right tool.
| Material | Appearance | Typical relative permeability, μr | Force results will vary |
Force results may vary |
|---|---|---|---|---|
| Stainless Steel (400 Series) | ~100–500 μ e.g., 430 SS (Ferromagnetic) | Force results will vary | ||
| Black-Oxide Alloy Steel | ~200-800 μ (Ferromagnetic) | Force results will vary | ||
| Zinc-Plated Alloy Steel | ~200-800 μ (Ferromagnetic) | Force results will vary | ||
| Low Carbon Steel | ~200-800 μ e.g., 1018 LCS (Ferromagnetic) | Force results will vary |
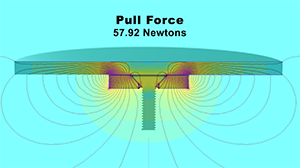
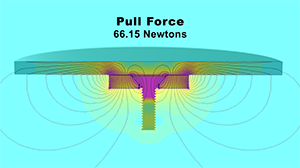
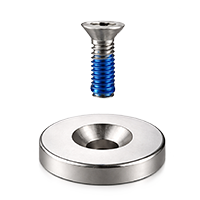
Ferromagnetic Washer/Backer
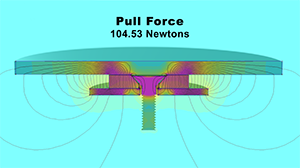
Adding a ferromagnetic washer (or backer plate) behind the magnet can greatly increase holding force because it provides a much larger, more effective return path for the flux and helps reduce “wasted” leakage field behind the magnet.
This is often the single easiest way to increase performance without changing the magnet itself.
A realistic performance increase is often 10–150%, depending on geometry and materials.
Best practice is to use a washer/backer that is wider than the magnet. Wider is generally better, but you’ll hit diminishing returns as you keep increasing diameter/area. Balance performance against cost, packaging space, and weight. If you can’t go wider, a washer about the same size as the magnet can still help quite a bit.
| Material | Appearance | Typical relative permeability, μr | Force results will vary |
Force results may vary |
|---|---|---|---|---|
| Stainless Steel (400 Series) | 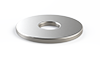 |
~100–500 e.g., 430 SS (Ferromagnetic) | Force results will vary | |
| Black-Oxide Coated Alloy Steel |  |
~200-800 (Ferromagnetic) | Force results will vary | |
| Zinc-Plated Alloy Steel | 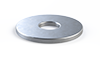 |
~200-800 (Ferromagnetic) | Force results will vary | |
| Low Carbon Steel | 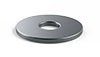 |
~200-800 e.g., 1018 LCS (Ferromagnetic) | Force results will vary | |
| Pure Iron | 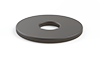 |
~2000-10000 (Ferromagnetic) | Force results will vary |
Proper Screw Installation
Proper screw installation is where things either go right, or you end up with a cracked magnet, a breached coating, or a loose assembly. The goal is simple: keep the pressure even, keep the magnet seated flat, and make sure the hardware stays tight over time.
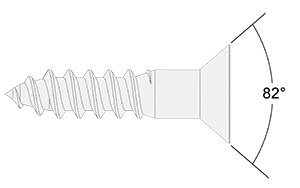
Screw Taper Angle
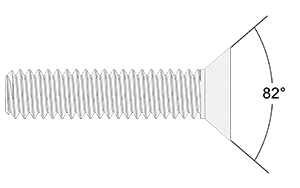
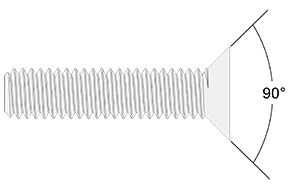
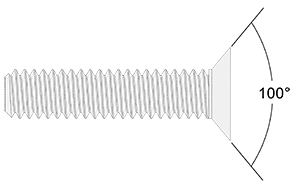
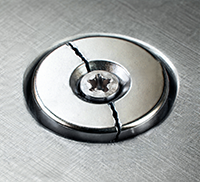
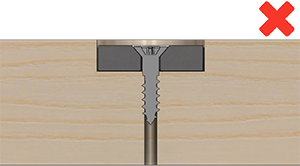
- Match the countersink angle in the magnet to the screw head angle so the screw head seats fully and spreads pressure evenly. If the angles don’t match, the head contacts in a thin ring, which creates high stress and chips plating or cracks the magnet during tightening. And it can wear away the plating if the device experiences vibration or movement from constant attaching and detaching.
- Common angles you’ll run into: 82° (many imperial flat heads), 100° (some imperial/structural and specialty flat heads), and 90° (common metric flat heads). The exact standard depends on the screw family, so don’t assume.
| 82° Taper (Flat Head) Typical for Imperial Screws |
90° Taper (Flat Head) Typical for Metric Screws |
100° Imperial (Flat Head) Special Imperial Screws |
 |
 |
 |
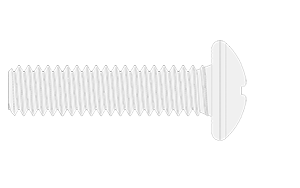
| Pan Head Screws Fit Counterbore Magnets |
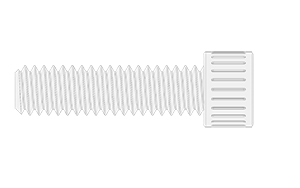
Socket Head Screws Fit Counterbore Magnets |
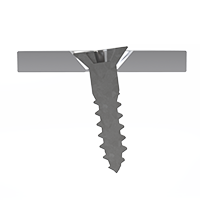
82° Wood Screws Typical for Wood Screws |
 |
 |
 |
 |
Over-Tightening Concerns |
 |
Thread Locking |
 |
The Importance of the Screw Angle |
|
|
|
 |
Coating Breach |

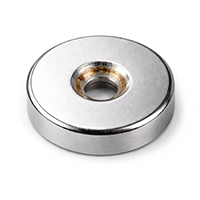
Flush Mount Magnets
For a flush-mounted countersunk magnet, the magnet needs to sit flat on the bottom of the pocket before you ever tighten the screw. If the pocket has a cone-shaped bottom, a ridge, or a burr, the magnet will “rock” and the screw will clamp it unevenly. That’s how you end up with chipped plating, cracked magnets, and loosening over time.

Methods good for flat seating:
| End mill (best choice) Creates a true flat-bottom pocket |
|
 |
 |
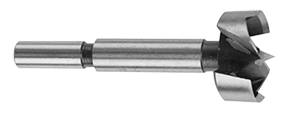
| Forstner bit For a clean, flat-bottom recess |
|
 |
 |
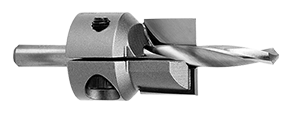
| Counterbore cutter or Spotfacer Flattens the bottom and creates a through hole. Make sure the through hole is not too large to fit the screw threads if you plan to screw the magnet into the same material. |
|
 |
 |
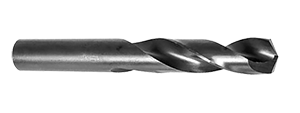
| AVOID: Standard Twist Drill Bits leaves a conical bottom which makes it very difficult to seat the magnet flush in the pocket. |
|
 |
 |
The Importance of Pocket Depth
If you don’t properly control the pocket depth, you may overshoot the hole depth, causing the magnet to sit too far down inside the pocket. If the magnet is further away from the target, the force will reduce significantly. Even small gaps can create large performance drops.
What if you did go too deep? Add a steel washer behind the magnet to bring it closer to the surface. This not only reduces the gap, but the steel backer can significantly increase your pull force.
Pocket Too Deep
|

Corrected with Steel Washer
|
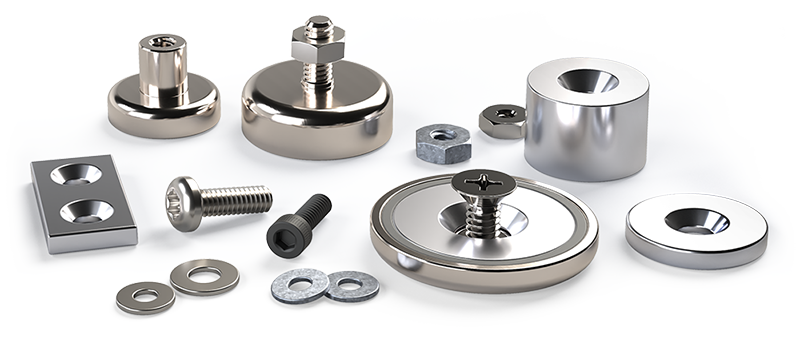
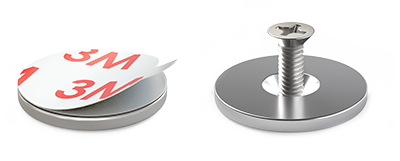
Magnets With Screw and Nut Mounting Options
This section is a quick tour of the main “screw-mount” magnet styles you’ll run into at AmazingMagnets.com. Each option solves a slightly different problem: flush mounting, higher durability, better corrosion protection, or easier installation when you only have access from one side
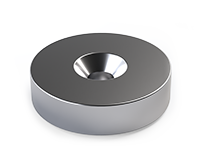 |
Countersunk Neodymium Magnets |
||
|
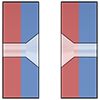
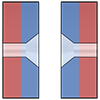
Attracting |
Repelling |
If you want to attach a countersunk magnet to another countersunk magnet then you will need one magnet with a countersink on the north pole and another with the countersink on the south pole because opposite poles attract. |
|
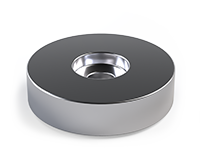 |
Counterbore Neodymium Magnets |
||
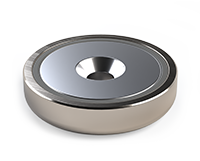 |
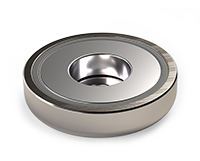
Countersunk Neodymium Cup Magnets |
||
 |
Counterbore Neodymium Cup Magnets |
||
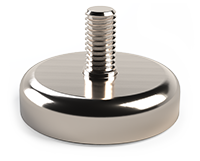 |
Male Threaded Neodymium Cup Magnets |
||
 |
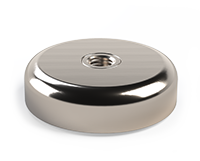
Female Threaded Post Neodymium Cup Magnets |
||
 |
Internal Threaded Neodymium Cup Magnets |
||