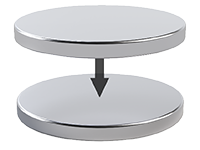
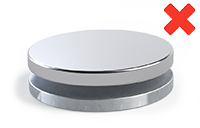
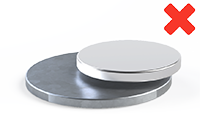
Designing Premium Magnetic Box Closures
Designing Premium Magnetic Box Closures
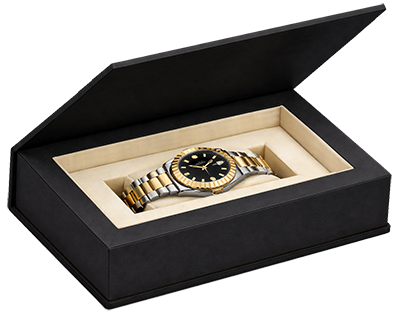
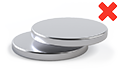
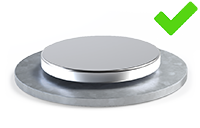
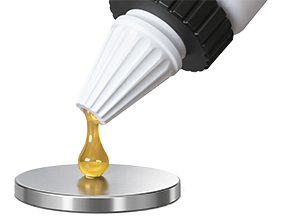
Don’t just Design a Package. Create a moment.
Packaging is an investment that reflects your confidence in the product inside. When the packaging feels well-made and intentional, it helps communicate the value of the product inside. Think of a restaurant with excellent food but dirty floors and a bad smell. Even if the food is great, the overall experience feels lower quality. Product packaging works the same way. The packaging starts to shape how customers perceive the product before they ever use it.
Premium magnetic box closures are one of the most cost-effective ways to reinforce that message and signal a high-quality product.
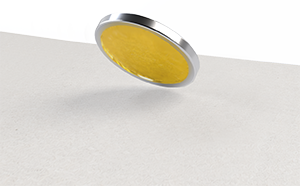
Magnetic closures also add a strong “cool factor” that can directly elevate perceived quality. A closure that feels precise, secure, and deliberate immediately stands out and makes the product feel more premium.
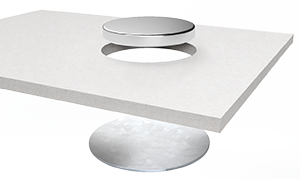
Magnetic closures do not have to be limited to a simple latch.
They can be designed to create more interesting interactions, such as twist-to-release, repel-then-latch behavior, and other combinations of magnetic attraction and repulsion that make the opening experience more memorable.
The purpose of this article is to provide practical design tips and key considerations for designing high-end magnetic packaging closures that feel premium, assemble reliably, and hold securely. Topics include best methods for embedding magnets in packaging, magnet and target selection, placement strategies, ways to hide or feature magnets, how box materials and layer thickness affect holding force, and common failure modes such as telegraphing, weak latching, polarity mistakes, and magnets coming loose.
Note: If you need help selecting magnet sizes, target materials, and placement to get the exact “end user experience” you’re after, please don’t hesitate to contact us.
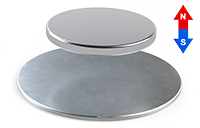
Magnet types used in packaging
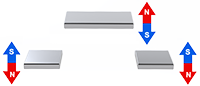
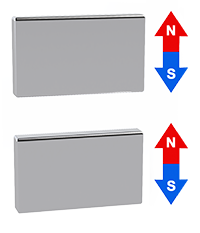
Magnetic closures in premium packaging usually fall into two buckets: rigid magnets (most commonly neodymium) and flexible magnetic materials (rubber-bonded ferrite or rubber-bonded neodymium).
 |
Ridged Sintered neodymium magnets are the go-to choice when you want a crisp, high-end “snap” and reliable holding force through gaps created by wrap paper, board, or fabric layers. |
 |
Steel Targets. Packaging designs often pair a magnet with a steel target to reduce cost. This comes with a small tradeoff of a slightly lower pull force and attraction distance compared to a magnet-to-magnet setup. |
 |
Flexible magnets are useful when you need a thin, compliant, flexible latch surface, but they typically require near-direct contact to work well because their holding force drops off quickly with distance. Even a thin gap created by a single layer of wrap paper can greatly reduce performance. |
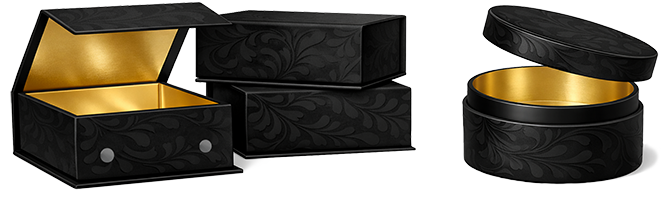
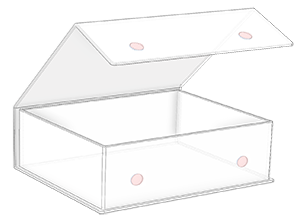
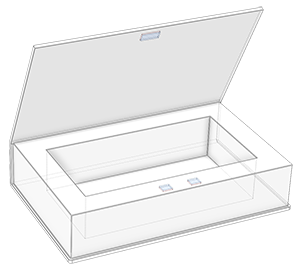
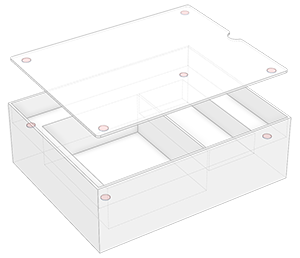
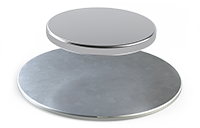
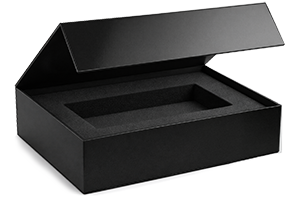
Common High-End Packaging Styles That Use Magnets
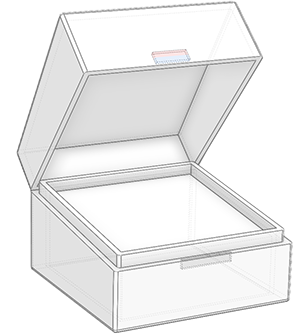
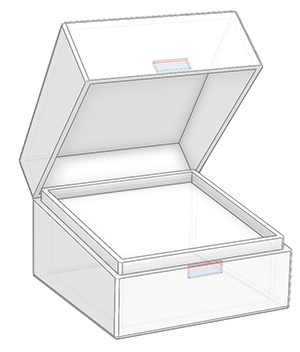
Hinged Ridged Boxes (With Tab)
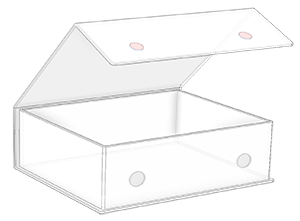
Rigid boxes with an integrated hinge made from a compliant material (typically paperboard wrap and board construction) that allows the lid to open and close repeatedly. A hinged rigid box with a front lip/tab on the lid that overlaps the side wall of the box when closed.
These are common for premium packaging and work well with hidden or exposed magnetic closures.
Magne to Steel Target
Magnet to steel target attraction. Attracts from a distance and jumps into place to stay closed
|
Magnet
Steel Target |
 |
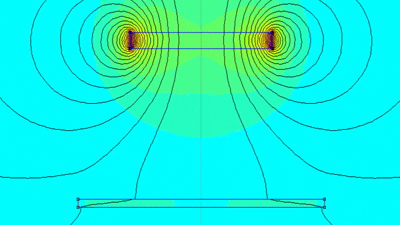
Magne to Magnet
Magnet to magnet attraction. Attracts from a further distance than magnet to steel, and jumps into place to stay closed
|
Magnet
Magnet |
 |
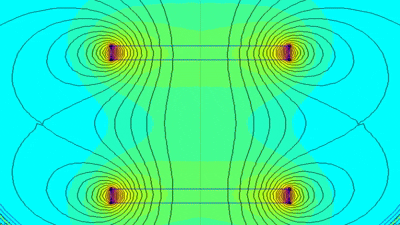
Repel Latch
A ring magnet used in conjunction with a smaller cylinder magnet (cylinder magnet must be smaller than ring ID).
Repels from a distance and then switches to attraction when the magnets are pushed close enough together. Create a nice push to snap close feel.
|
Magnet
|
 |
 |
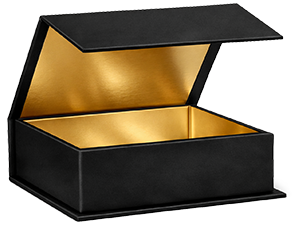
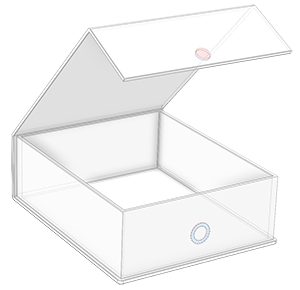
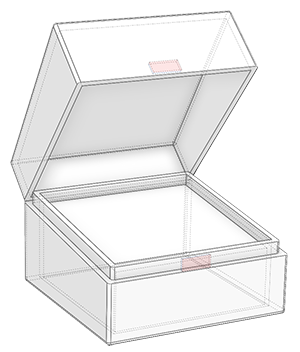
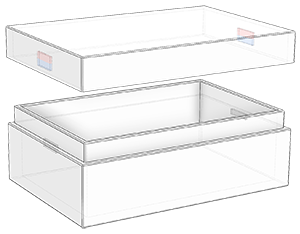
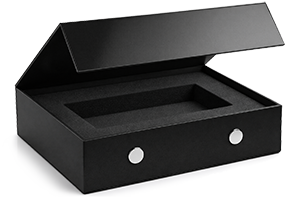
Hinged Lift-Top Style Box
A hinged box where the lid fits snugly over the bottom section.
Magnet to Steel Target
Magnet to steel target attraction. Attracts from a distance and jumps into place to stay closed
|
Magnet
Steel Target |
 |
Magnet to Magnet
Magnet to magnet attraction. Attracts from a further distance and jumps into place to stay closed
|
Magnet
Magnet |
 |
Repel Latch
When you have 2 plate magnets moving vertically relative to each other, they can initially repel, then snap together when they get close enough together. This creates a noticeable detent in the closure where the magnets will pause then snap together when pushed closed, all without the need for fancy hinges.
|
Magnet
 Magnet
|
 |
 |
Book-Style Hinged Box
A hinged rigid box designed like a book or hidden-compartment book, where the lid opens like a front cover.
This style is ideal when you want the closure to feel concealed and elegant.
Magnet to Steel Target
Magnet to steel target attraction. Attracts from a distance and jumps into place to stay closed
|
Magnet
Steel Target |
 |
Magnet to Magnet
Magnet to magnet attraction. Attracts from a further distance than magnet to steel, and jumps into place to stay closed
|
Magnet
Magnet |
 |
Repel Latch
Plate magnets configured like this will initially oppose (repel) each other, then snap together when pushed closer together.
|
Magnet
|
 |
|
 |
||
 Magnet Magnet
Removable Top Boxes
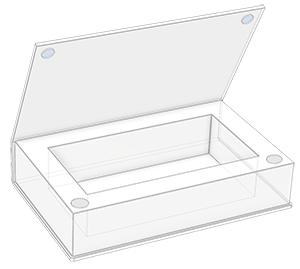
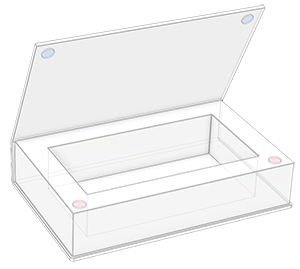
Rigid boxes with a fully detachable lid (no hinge). These are widely used in luxury packaging and can support several magnetic closure approaches depending on lid geometry.
Design note:
Rectangular magnets (magnetized through the width) can reduce horizontal space usage while still providing good holding force
This is useful when wall thickness and internal space are limited.
Magnet to Steel
Magnet to steel target attraction. Attracts from a distance and jumps into place to stay closed.
|
Magnet
Steel Target |
 |

Conventional Magnetic Latch
Magnet to magnet attraction. Attracts from a further distance than magnet to steel, and jumps into place to stay closed.
|
Magnet
Magnet |
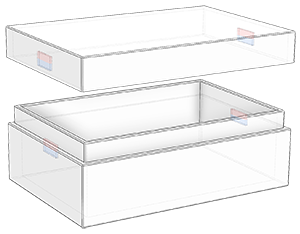 |
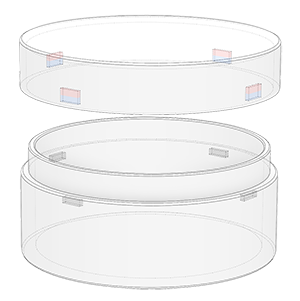
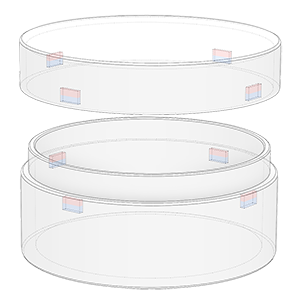
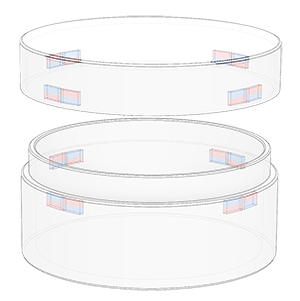
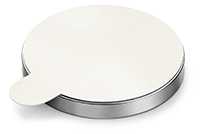
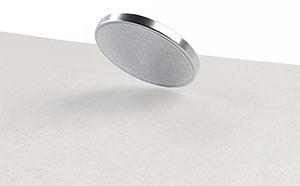
Round Lift-Top Boxes
A circular box with a removable lid. Works by embedding thin magnets into the walls of the circular box. If the magnet is thin enough, they can be prevented from telegraphing (showing) on the outside of the box.

Magnet to Steel Target
Magnet to steel target attraction. Attracts from a distance and jumps into place to stay closed.
|
Magnet
Steel Target |
 |
Magnet to Magnet
Magnet to magnet attraction. Attracts from a further distance than magnet to steel, and jumps into place to stay closed.
|
Magnet
Magnet |
 |
Twist Release Latch
Placing 2 magnets with different polarities like this can create a cool twist-to-release function. Where turning the top of the box will cause the magnets to switch from attraction to repulsion so the box lid pops off magnetically.
|
Magnet
Magnet |
 |

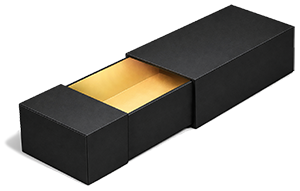
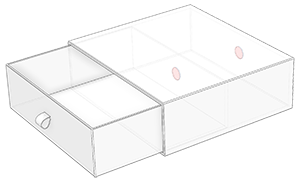
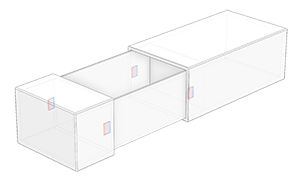
Matchbox Style (Sleeve + Tray)
A box where the inner tray slides into an outer sleeve (often called a matchbox-style rigid box).
These are excellent candidates for creative magnetic retention and “assisted latch” effects.
Matchbox Styles
The inner tray slides into an outer sleeve, typically with a friction fit.
 |
 |
Conventional Magnetic Latches
Magnet to magnet or magnet to steel target attraction. Attracts from a distance and jumps into place to stay closed.
|
Back Wall Placement
 |
Side Wall Placement
 |
|
Magnet
 Steel Target
|
Magnet
Magnet
|
Internal Panel Partition
An internal panel or partition used to separate contents inside the box.
This partition can also include magnetic features for:
- Removable magnetic panels
- Hidden accessory compartments
- Retained inserts or trays
Magnetic partitions can improve presentation while keeping parts organized.
Magnet to Steel Target
Magnet to steel target attraction. Attracts from a distance and jumps into place to stay closed.
|
Magnet
Steel Target |
 |
Magnet to Magnet
Magnet to magnet attraction. Attracts from a further distance than magnet to steel, and jumps into place to stay closed.
|
Magnet
Magnet |
 |
Choosing the Correct Magnet Configuration
The magnet configuration you choose has a major impact on both closure performance and how the package feels to the user.
Magnet-to-magnet, magnet-to-steel, and flexible magnet systems can all work well, but each one creates a different opening and closing experience. Some feel more dramatic and premium, while others are better suited for cost-sensitive designs or very thin packaging formats.
When selecting a closure type, do not just think about holding force. Also think about:
- How early the lid starts to “pull in”
- How much tolerance the box design has in production
- How thick the packaging layers are between the magnetic components
- Whether the closure should feel soft, firm, snappy, or subtle
If you need help selecting the right configuration for your packaging, feel free to contact us and speak with an engineer.
Magnet to Steel Target
|
Magnet to Magnet
|
 |
|
Magnet to Magnet
Typical user experience
- Strong attraction
- Longer attraction distance
- More dramatic “snap-to-close” feel
- Self-Centering / Alignment (If there is any play in the box hinge, the magnet shifts to align perfectly with the target magnet)
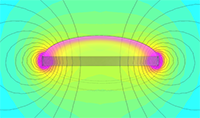
When a neodymium magnet closes onto another neodymium magnet, the attraction begins from a longer distance compared to most other closure types. This often creates a more premium user experience because the lid can feel like it “finds” the closed position and pulls itself into place.
That longer attraction distance can also be helpful in packaging design because it gives you more tolerance for:
- thicker wraps
- layered paperboard structures
- decorative materials between the two magnets
In other words, this configuration is often the best choice when you want the closure to feel noticeably magnetic and memorable.
|
Design Note: It is usually best to keep the mating magnet diameters (or edge profiles) the same. Magnet pull force is strongly influenced by edge-to-edge field interaction, so keeping the magnet edges aligned helps maximize holding force.
|
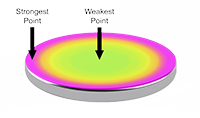
Good Edge Alignment
Excellent Pull Force
|

Mismatched Magnet Diameters
Moderate Pull force, Not Ideal
Magnets may try to attach off-center
(to one side or the other)
|
Poor Magnet Edge Alignment
Reduced Pull Force
|
Important caveat
If the gap between the two magnetic components is relatively large (for example, greater than about 0.05” from cardboard, wrap, and adhesive stack-up), you are afforded a little more flexibility with diameter mismatch and edge alignment. At larger gaps, the field spreads more before contact, so slight edge mismatch may not hurt the centering and pull force as much as it would in a very tight-gap design.
Magnet to Steel Target
Typical user experience
- Strong attraction
- Medium attraction distance
- No Self-Centering / Alignment (The magnet “lands where it lands” on the steel target. Perfectly fine if the box hinge is tight)
A neodymium magnet closing onto a steel target is a very common packaging solution because it offers a strong latch while reducing cost. Steel targets are often much less expensive than a second neodymium magnet and can still produce a very good closure experience.
Compared with magnet-to-magnet, the attraction usually starts at a shorter distance. This means the closure may feel a little less dramatic, but still very solid and premium when designed correctly.
This shorter attraction distance also means stack-up thickness matters more. Paper, board, wrap, glue, and any pockets between the magnet and steel target can reduce the closure effectiveness if not accounted for. See our force estimates table below for more details on attraction vs. distance.
|
Design Note: Make sure the steel target is wider than the magnet, this helps with the overall pull force and can overcome small alignment problems that occur during production. Magnet-to-steel assemblies don’t automatically align themselves like magnet-to-magnet assemblies do, so if there is play in the box hinge they could attach at a slight offset.
|
Good Alignment, Steel Wider
Than Magnet
Excellent Pull Force
|
Magnet Dia Matches Steel Dia
Moderate Pull force, Not Ideal
Magnet tends to attach at an offset
|
Poor Alignment
Reduced Pull Force
|
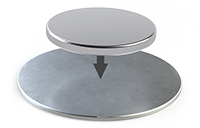
Magnet to Box Attachment Methods
The magnet mounting method must match the opening force, board construction, wrap materials, and assembly process.
A key design consideration is the relationship between magnet pull force and adhesive retention area. If the magnetic attraction is high but the bonded area is too small, the board can tear, the wrap can delaminate, or the magnet can pull free from the panel over time.
In premium rigid box construction, the best attachment approach often depends on:
- board thickness
- available panel area
- whether the magnet is hidden under the wrap or exposed internally
- cycle life expectations
- opening style and peel forces
- assembly speed and labor sensitivity
Adhesive Backings
Ideal for quick assembly
Magnets can be supplied with a pressure sensitive adhesive (PSA) backing and release liner with an easy-to-remove tab. PSA backed magnets are very common for box manufacturing because they simplify assembly and reduce mess. For many box programs, they are the fastest and cleanest option, especially when the magnet is being applied to a flat, prepared surface during manual or semi-automated assembly.
 |
 |
They are often a good fit when:
- magnet size provides enough bonding footprint (bonding surface area vs. magnet pull force)
- the substrate is smooth, clean and responds well to adhesive tape.
- production values speed
The main limitation is that pressure sensitive adhesive (PSA) performance depends heavily on surface area and load type. A magnet that is only lightly loaded in may perform well, while the same magnet may fail if the opening action creates a static peeling load over long periods of time or concentrated stress at one edge.
For box makers, this is where tear-out risk becomes important. If the magnet pull is high relative to the bonded area, the failure may not even occur in the adhesive itself. Instead, the paper wrap, laminated stock, or top layer of the chipboard can fail first.
Common failure points:
- the board surface is rough or has loose fibers that do not stick well to adhesive tape
- the magnet surface area is small compared to its power
- there is a constant (static) load pulling on the magnet (slow failure over time)
Best practices for adhesive-backed magnets:
- maximize bonded footprint whenever possible
- keep surfaces clean and free of dust, release agents, and loose fibers
- apply firm pressure during bonding
- allow adhesive dwell time when needed before testing full strength
Glues
Stronger holding force, but highly sensitive to surface cleanliness and process control
Liquid adhesives are often a better choice when attaching a magnet to a board with rough texture or more loose fibers. The glue seeps in and can hold on materials that adhesive tape struggles with. They can also be useful for filling small gaps, or securing magnets into pockets or cavities as they can aid in keeping multiple chipboard layers bonded together to prevent peel-away when under stress.
 |
 |
When done correctly, glue can produce a stronger and more durable attachment than pressure sensitive adhesive (PSA) tapes. However, it is also much more process-sensitive. Bond quality can vary significantly depending on:
- cleanliness of the magnet
- attaching surface (low surface energy materials like plastic often don’t bond well with glues)
- clamping pressure
- adhesive type
A very strong glue joint attached to weak paperboard layers can simply move the failure point into the board. Instead of adhesive release, you get fiber tear, delamination, or blistering under the wrap.
Because of that, stronger glue should usually be paired with one or more of the following:
- thicker more ridged board
- other capture features like a pocket (glue can hold to the edges of the magnet as well as the bottom)
- a wider steel target or backer that distributes load
Glue is especially useful as a backup retention feature when combined with partial mechanical capture. That combination is often much more robust than glue alone.
Best practices for glued-in magnets:
- clean the magnet surface before bonding
- avoid overapplying glue, which can create squeeze-out and cosmetic issues
- use enough adhesive to wet the surface, but not so much that the magnet floats
- control cure time before downstream handling
- validate performance on actual wrapped boards, not just bare samples
Mechanical Retention
A more robust retention method for higher-force closures
In this method, the magnet sits in a through-hole in the chipboard, and the hole is sized slightly larger than the magnet. A steel backer plate or disc is placed behind it and is wider than the hole, so it physically prevents the magnet from pulling through. A small amount of adhesive can then be added between the magnet and steel backer as a secondary retention feature.
 |
 |
This method is effective because it reduces dependence on adhesive alone. Instead of asking the adhesive or paper fibers to resist the full magnetic pull-out force, the load is transferred more mechanically through the captured structure.
For box manufacturers, this offers several advantages:
- better resistance to tear-out
- more tolerance to surface cleanliness variation
- less dependence on adhesive bond strength alone
- improved durability over repeated opening cycles
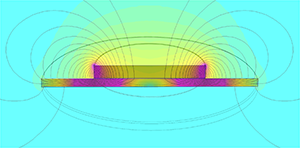
- increased pull force when the steel backer redirects the flux from the back of the magnet to the front
This style of retention also helps address one of the biggest risks in magnetic box closures: small magnets producing surprisingly high local pull forces. Without mechanical capture, those forces can concentrate into a small bonded footprint and defeat the adhesive bond. With mechanical capture, the steel backer spreads the load across a larger area and acts as a mechanical stop.
A few design notes for this method:
- The magnet will usually prefer to stay attached to the steel disc if there is some gap between the magnet surface and the target.
- Add a little adhesive between the magnet and the steel disc as a backup retaining method. (we can supply them pre-attached upon request)
- the through-hole should be controlled carefully so the magnet seats cleanly without excessive play
- the steel backer should be large enough to provide meaningful load distribution
- the backer geometry should avoid creating show-through, bulging, or witness marks on the finished panel
This can be accomplished by using very thin steel or adding a second chipboard with a thickness and hole dia that hides the steel backer.
For many rigid box applications, this is one of the best ways to balance assembly practicality, premium feel, and long-term retention reliability.
Practical Design Guidance: Adhesive Area vs. Magnet Pull
When specifying a magnetic closure, it is easy to focus only on the holding force between the magnet and the steel target. But for the box manufacturer, the more important question is often:
Can the board construction and attachment method carry that load repeatedly without tear-out, delamination, or cosmetic damage?
A closure should be designed as a full system, not just as a magnet pair. That means balancing:
- magnet size
- target size
- panel thickness
- wrap construction
- bond area
- opening geometry
If the magnet is too strong for the attachment area, common failure modes include:
- magnet pulling out of the panel
- top paper layer tearing away from the chipboard
- wrap bubbling or lifting
- local crushing or deformation
- gradual loosening after repeated use
In many cases, increasing the magnet size slightly can help more than simply choosing a stronger grade. A wider, thinner magnet may provide:
- more adhesive area
- lower stress concentration
- better retention reliability
- a more forgiving assembly process
Likewise, a wider backer or capture feature can often improve durability more effectively than increasing magnetic force.
The best-performing box closures usually come from a balanced design where:
- the closure feels crisp but not overly aggressive
- the magnet retention method has sufficient margin
- the substrate carries load over enough area
- the assembly method is repeatable on the production floor
Need help developing your magnetic box closure?
We work with box manufacturers to develop magnetic closure systems that feel premium, assemble cleanly, and perform reliably in production. This includes help with magnet sizing, steel target selection, attachment method design, board construction, and closure force tuning. We can also provide magnet and steel target samples for hands-on testing, allowing you to evaluate pull strength, opening feel, and attachment performance on your actual box construction before finalizing the design. If you are looking to reduce tear-out risk, improve consistency, or create a more refined closure experience, we can help.
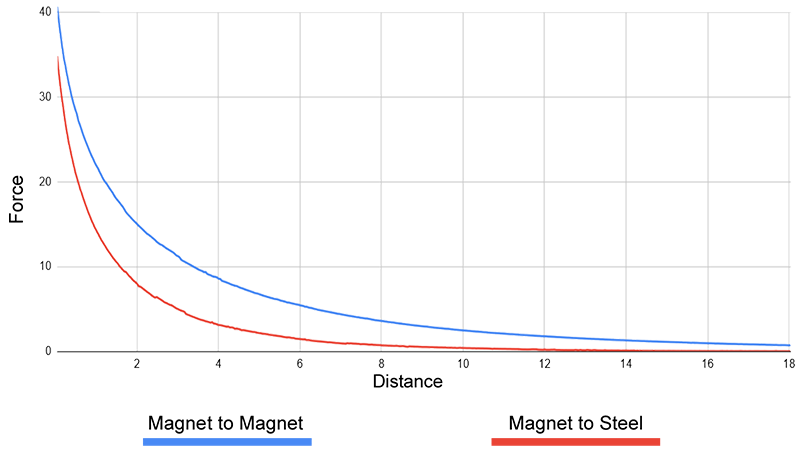
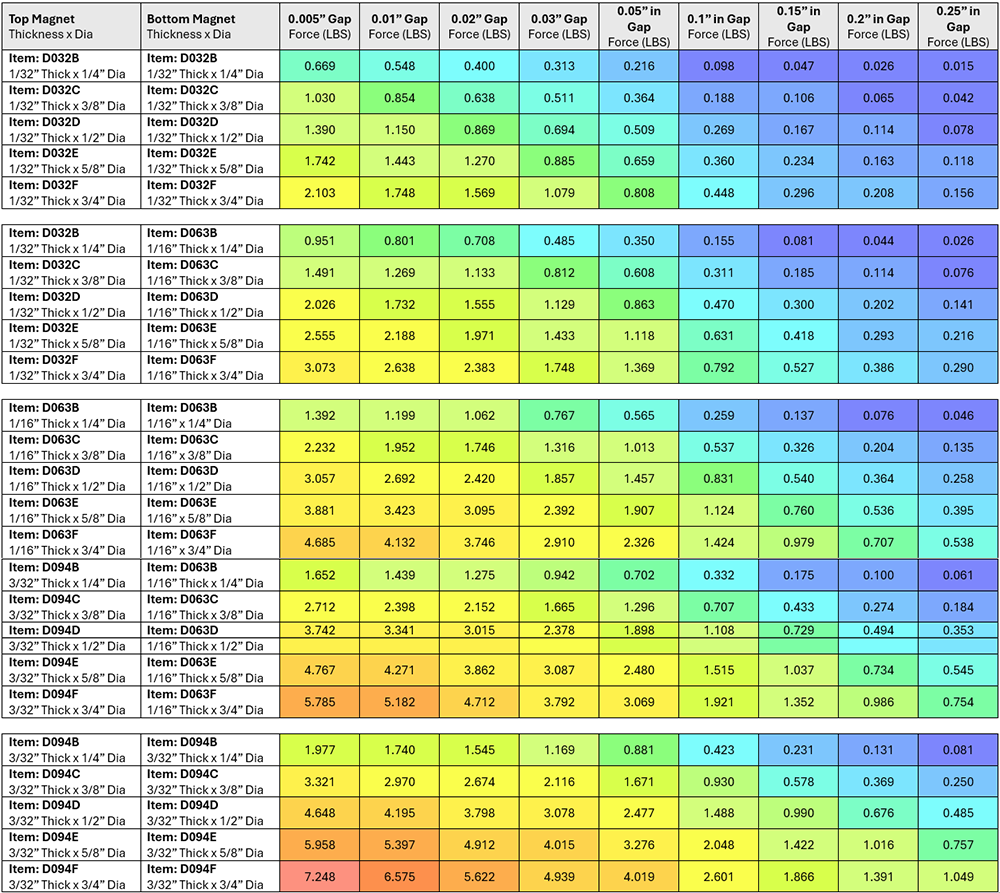
Magnet Force Estimates
Below are some magnet pairs commonly used in magnetic box closures and their comparative pull-forces over various distances.
Note: The design of a premium magnetic box comes down to overall feel (that not only includes magnet forces but also elastic forces inherent in the box materials and hinge construction), This is where simple magnet force numbers can fall short. We suggest using these force estimates in conjunction with physical testing to nail down the perfect magnetic latch feel.
WARNING: These pull force estimates are measured in ideal conditions. Considering Perfect edge alignment and magnet placements. Your results will vary based on minor changes and imperfections in material thicknesses and alignment.
Pull Force Color Scale
Magnet To Magnet
The magnet grades in these estimates are all N40. You can get slight increases in the pull force (without affecting the size) by using grade N52 magnets instead. We offer many magnet sizes and grades in between these. You can safely interpolate the estimated force for magnet sizes between the ones listed below.
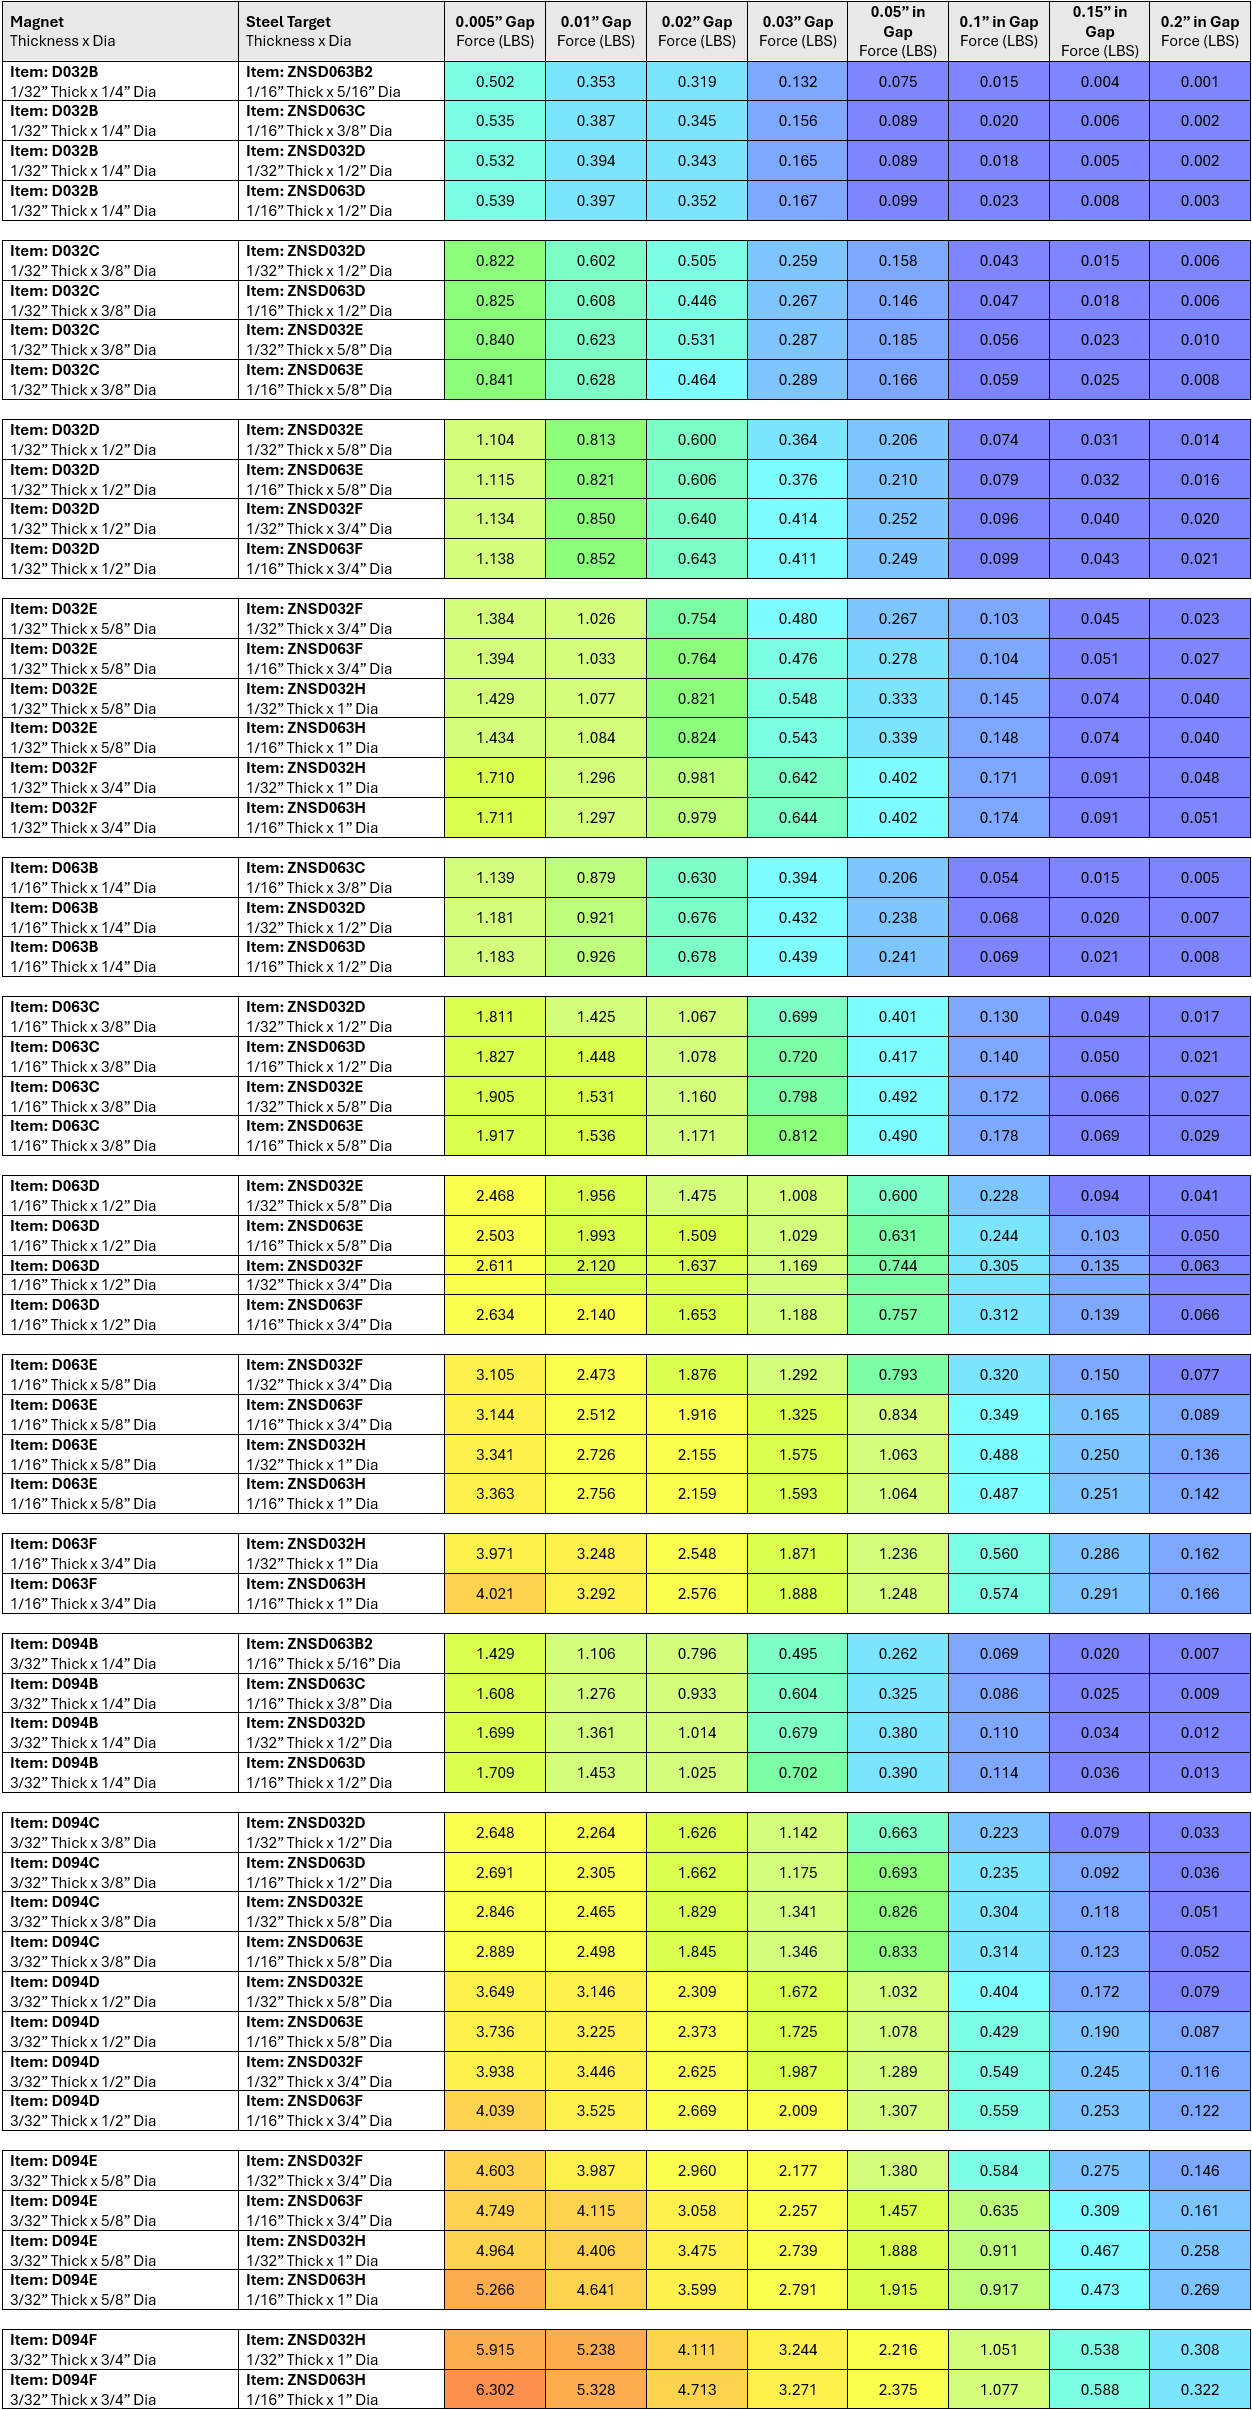
Magnet To Steel Target
The steel target material in these estimates are 1020 Low Carbon Steel. The steel targets are normally zinc plated but can be custom made with other platings/coatings like Nickel or Black Epoxy if they are exposed and visible to the end user and need to look nice. The magnet grades in these estimates are all N40. You can get slight increases in the pull force (without affecting the size) by using grade N52 magnets instead. We offer many magnet sizes in between these. You can safely interpolate the estimated force for magnet sizes between the ones listed below.
Magnet & Steel Target Samples
Designing a premium magnetic box closure ultimately comes down to the overall feel, not just raw magnet force. That feel is influenced by the full closure system, including magnetic attraction, box geometry, wrap thickness, panel stiffness, and the elastic behavior of the box materials and hinge construction.
Because of this, simple pull-force numbers alone do not always predict how the closure will feel in the user’s hand.
We recommend using force estimates as a starting point, then validating the design with physical prototypes to fine-tune the latch experience. Hands-on testing is often the fastest way to dial in the right balance of closure strength, alignment feel, and opening effort.
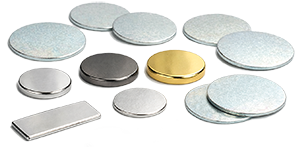
Contact us about a magnet design kit. We can provide a set of magnet and steel target samples in multiple sizes that best match your requirements, so you can quickly test different closure combinations on your packaging prototypes.
Exposed Vs Hidden Magnet Box Designs
One of the earliest design decisions is whether the magnets should be visible as a design feature or hidden inside the packaging structure. Both approaches can work well, but they create very different user experiences and manufacturing requirements.
Hidden Magnet Box Designs
Hidden magnets are the most common choice for premium packaging. They create a clean, seamless appearance and let the closure feel “magical” to the user because the box snaps shut without revealing how it works. Hidden designs are especially useful for luxury boxes, book-style boxes, and rigid lift-top boxes where the goal is an elegant, refined presentation. The tradeoff is that hidden magnets require tighter control over placement depth, alignment, adhesive retention, and cover layer thickness because the outer wrap and board material reduce magnetic holding force.
Exposed Magnet Box Designs
Exposed magnets can be a strong visual feature when used intentionally. They can communicate a technical, industrial, or modern aesthetic as opposed to a plain box. However, they require more attention to appearance, coating quality, corrosion resistance, and careful/accurate assembly because the magnet itself becomes part of the visible product. If exposed magnets are used, the surrounding design should make them look deliberate rather than unfinished.
Finishes, Corrosion, and Aesthetics
Magnet finish selection affects more than appearance. It also impacts durability, corrosion resistance, handling during assembly, and long-term performance in the package environment. In many packaging applications, the magnet is hidden, but finish still matters because corrosion or coating failure can lead to staining, swelling, or adhesive failure.
Important Note: If the magnet is not cleaned properly the adhesive will fail regardless of the plating type.
Hidden Magnet Plating Options
For hidden magnets in dry indoor packaging, standard Nickel plated magnets (Ni-Cu-Ni) and Zinc plated steel discs are often sufficient if they are properly sealed inside the structure and protected from moisture exposure. Even in hidden applications, it is important to consider humidity, glue chemistry, and the possibility of moisture entering through seams or damaged wrap materials.
Nickel (Ni-Cu-Ni) Plating
 |
|
Zinc (zn) Plating
 |
|
Exposed Magnet Plating Options
For exposed magnets, finish quality becomes a major visual and functional consideration. If the magnet is visible, choose a finish that matches the product aesthetic and is durable enough for repeated handling. Surface energy for bonding with glues and adhesives is also an important consideration for magnets. We recommend using one of the below magnet platings to ensure there is a strong adhesive bond between the magnet and the surface you are attaching them to.
Nickel (Ni-Cu-Ni) Plating
|
|
Dark Nickel (Ni-Cu-Ni) Plating
 |
|
Gold (Ni-Cu-Ni-Au) Plating
 |
|
Design Checklist and Summary
A premium magnetic closure should do more than just “stick.” It should align well, close consistently, resist accidental opening, and feel intentional in the user’s hand. Before finalizing a design, review the closure as a complete system rather than focusing only on magnet size or pull strength.
Quick Design Checklist
- Define the closure goal: soft close, firm latch, hidden snap, twist release, etc.
- Choose magnet-to-steel or magnet-to-magnet based on space, cost, and alignment needs
- Confirm magnet orientation and polarity early to avoid assembly mistakes
- Verify placement location and spacing for consistent closure feel
- Account for wrap thickness, board thickness, and adhesive layers between magnetic components
- Check for telegraphing risk (visible bumps or sink marks in the outer wrap)
- Select a magnet size and grade that provides margin, not just minimum holding force
- Choose adhesives and pocket geometry that prevent magnets from coming loose over time
- Review finish/coating requirements for corrosion resistance and appearance
- Prototype and test opening/closing feel with the actual packaging materials, not just loose magnets
Summary
The best magnetic packaging closures combine good magnetic design, good structural design, and good packaging craftsmanship. A strong magnet alone will not guarantee a premium result if the box geometry, material stack-up, or assembly process is inconsistent. When designed well, magnetic closures can significantly improve perceived quality, create a memorable unboxing experience, and reinforce the value of the product inside.
Need Assistance?
If you are designing a magnetic closure for premium packaging and want help selecting the right magnet configuration, placement strategy, or retention method, we can help.
We provide practical magnet design support for packaging applications, including:
- Magnet-to-magnet vs magnet-to-steel closure recommendations
- Magnet and steel target samples for in-house testing
- Magnet sizing and placement guidance
- Strategies for hidden magnets and reduced telegraphing
- Design feedback to improve closure feel and reliability
- Support for prototyping and design-for-assembly decisions
Whether you are refining an existing box design or starting from scratch, getting the magnetic closure details right early can save time, reduce rework, and improve the final customer experience.
Need help with your magnetic packaging closure design? Reach out for design guidance or a consultation.